Sunday, December 27, 2009

Quilted Purse for my Mother-in-Law

I made my mother in law (MIL) a quilted purse from a pattern that I had gotten for $0.99 at Hancock Fabrics.  It seemed easy enough!  I went to JoAnn’s with my trusty 40% off coupon and went searching for a pretty quilted fabric.  I didn’t realize you could get the fabric already quilted!  Super easy! 


Here is the pattern that I used.


003
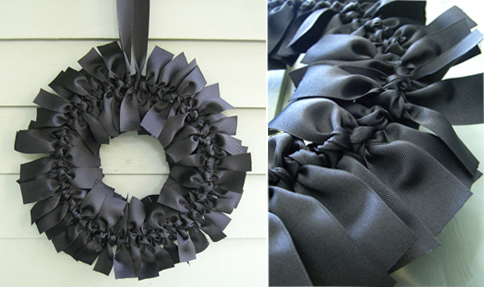
And here is my finished product:
milpurse
milpurse2
My MIL absolutely loved it!  I am so glad it turned out well since I really haven’t done many patterns.  There were a few times I had to step away for a while and come back and read the directions again.  But other than that it was a pretty easy pattern and it came out lovely!


blogsignature

Sunday, December 13, 2009

The Last of the Fall Decor

Here are couple of pictures of more of my fall decor that I had. 

falldecor
These pumpkins were so cute AND they were only $2.99 at Micheal’s!


falldecor1 


blogsignature

Saturday, November 7, 2009

Ball Ornament Wreath DIY

I found this website and fell in love with this easy DIY project for the upcoming holidays.  It shows you how to use those glass ball ornaments to make wreath.  I will definitely will have to try it out.


Here is the website and tutorial from the Eddie Ross website.


And here is a picture of the finished product taken from the website.


Tuesday, October 27, 2009

One Skillet Chicken & Rice

Tonight I made a delicious one skillet meal that was super easy to make.  Another plus was that it took about 20 minutes to make!
oneskilletchickenandrice
One Skillet Chicken & Rice
1 lb of boneless chicken breast cut into bite size pieces
1 cup of uncooked white rice
2 cloves of garlic
1/2 onion chopped
1/2 cup of frozen peas
1/2 cup of broccoli
1 1/3 cup of chicken stock
1 can of Cream of Mushroom soup
Salt and pepper to taste
Shredded cheese for garnish

1.  Season and cook chicken thoroughly.  Remove from skillet, set aside.
2.  Cook garlic and onion.
3.  Add rice and cook for about 3 minutes stirring constantly.
4.  Add chicken stock, peas and broccoli and bring to a boil, stirring occasionally.


5.  Reduce heat, cover and simmer for 15 minutes or until stock is absorbed.
6.  Return chicken and add the cream of mushroom, salt and pepper to taste.
7.  Mix thoroughly, top with shredded cheese.

It really came out delish and I was quite surprised how easy it was to make. 

Fall Table Setting

So I made TWO of my napkins and I couldn’t wait to see what it looked like at the table so I rushed downstairs and took some pictures.  I LOVE how it turned out!  I can’t wait to make the small mat to go under the centerpiece so that everything comes together!  Here are some pictures of what each setting looks like.


tablesetting 
You can see the beautiful color of the placemats.  I fell absolutely in love with the fabric when I saw it at Hobby Lobby.  The ribbon I got on sale at Joann’s and the leaves I also got at Joann’s.

tablesetting2


I only made two napkins, so I have two more napkins to make.  My dining room table is almost complete!

blogsignature

Monday, October 26, 2009

Crockpot Rosemary & Red Wine Vinegar Chicken with Mashed Butternut Squash


rosemaryredwinechicken
I made this dinner totally on the fly.  I am without my hubby this week since he is out of town in Detroit for a tradeshow so I really didn’t have anything on the menu.  I had taken some chicken out and didn’t really want to cook so I came up with this chicken recipe.  I also had a butternut squash that I had gotten at the grocery store that I wanted to try since I had never had or cooked it before.


Crockpot Rosemary & Red Wine Vinegar Chicken
About 1/2 lb. frozen bone-in chicken drumsticks (you can use whatever kind you like)


1/2 onion chopped


1/2 Tablespoon of rosemary


1 Tablespoon of red wine vinegar
1 Tablespoon of extra virgin olive oil

Place onion at the bottom of the Crockpot.  Place chicken on top of onions.  In a small bowl combine rosemary, vinegar and EVOO, pour over chicken.  Cover and cook on low for 6 – 8 hours. 

Mashed Butternut Squash
1 butternut squash
1/2 small onion chopped
1/2 cup of grated parmesan cheese
1 cup of bread crumbs
parsley for garnish


Cook butternut squash by slicing in half lengthwise and deseeding.  Place skin side up in a baking dish.  Add 1/4 in. of water in baking dish.  Bake at 350 for about 30 minutes or until fork tender.

Scoop squash into a mixing bowl.  Add onion, cheese and bread crumbs and mix.  Place in baking dish and bake on 350 for about 20 minutes.

   Once cooked garnish with parsley.

It came out pretty tasty and was quite surprised how it reminded me of mashed sweet potatoes –which I love!

Sunday, October 25, 2009

My Fall Decor

So it’s finally the fall season and that means fall decorating!


This is the first time decorating my new home so I definitely had a lot of fun with it.  I am not completely finished with everything but this is what I have started so far.


The outside of our house:
004 
The fall ribbon wreath that I made from material found at the Dollar Store:
005


My garden flag:
006 
The staircase:
010 


The fireplace:


023


013 


015 


The dining room centerpiece:
003


You can sort of see the placemats that I made.  I will get pictures of them once I finish sewing the napkins for the table.    Also if there is fabric left over I will make a mat for the centerpiece to sit on because I am not digging the beige one with the other decor.  That is pretty much the only things that I have left to do.


I think that is all the decorating that I am going to do this year.  I have a table runner and pumpkin spice candle on my coffee table that I didn’t get a picture of yet since the coffee table is quite messy at the moment.  I will try and get one of that soon.


Happy Fall Y’all!
blogsignature

Laptop Sleeve


Here is the laptop sleeve that I made my husband.  It really came out super cute!  I love it!  More importantly HE loves it!  He takes his laptop everywhere (for work) and he isn’t the best about taking care of it so this is perfect for him.


It was really easy to make as well.  I basically used this tutorial that I found online.  I changed it a little bit to best suit what materials I had around my craft room.  

Monday, October 5, 2009

My current addiction….

I know I have been MIA lately.  I have been doing some neat things but have not had my camera lately to post some awesome pictures.

   I should be back soon with  pictures of what I have been doing.


My current addiction is fall decor.  I have been busy decorating my house with pumpkins and fall leaves.  It has been so fun!  The Dollar Store has been my friend as well.  I have some sewing to do.  I am going to make some placemats and possibly a table runner.


I will post pictures soon!

Thursday, September 10, 2009

My Yummy Dinner

Tonight I made the most yummiest dinner ever!  It really was heavenly.  I unfortunately didn’t take pictures of my yumminess but I will definitely be making it soon so I am sure I will get some then, plus my camera’s battery was dead.


Here are the two recipes that I made:

Twice Baked Sweet Potatoes
Eureka Chicken

blogsignature

Monday, August 24, 2009

When the cats away the mice will play.

I think that is the saying, right?  My hubby is out of town and I have definitely been addicted to the sewing machine the passed three days!  I have gotten so many sewing projects done, it’s been fun!


I had totally forgotten that I had saved this cute tutorial on a quilted wallet a while ago.  I was looking through my favorites and found it again.  I immediately said I had to do it now!  So I got my last couple of supplies… a few fabric quarters and snaps for the closure and I locked myself in the sewing room.  Next thing I know I am done and it is so late!  But I am happy with the way it turned out… I can see a couple of imperfections but that is just because I am critical of myself.  Though it is great looking.  I was going to make my own tutorial but I didn’t really get a picture of each step since sometimes I would just forget!  So here are some pictures of my completed wallet.  I have a black and grey Coach purse so I picked the colors to match.


The front:
0161
The inside:
017
The snap closure:
018

I am really pleased with how it looks!  And it wasn’t terribly difficult.

blogsignature

My Sorority Tshirt Blanket

A couple of weeks ago I had started to recycle my old sorority tshirts.   I really like the idea of turning it into a blanket and that is what I set out to do. 
The stretchiness of the fabric of the tshirts was definitely a challenge for me since I am novice but I think all in all it turned out great!  I might add a couple of more embellishments but it is complete.

You can see the front here:
030
And you can see the back here:
032  
I am so glad that I decided to do this since I didn’t want to just throw them away.  It definitely came out perfect!

blogsignature

Dollar Store Craft

I finally completed my first Dollar Store Craft.  I made a library tote out of two placemats and a belt all found at the dollar store.  It was hard finding two placemats of the same fabric.  Imagine if I needed 4 of the same one… they didn’t have many placemats that matched!

This is especially great because I have been going to the library a lot lately and usually get three or four books at a time.  Now I have a cute bag to carry them in.


Here is my final project.
027 


This is definitely a great gift as well since it is such a quick and inexpensive craft.

blogsignature

Friday, August 21, 2009

So I lied…


Yesterday I said that my next project would be a fall wreath but actually I just sewed a camera case.  Today I decided to scope out Joann’s sale and bought quite a few yards of cheap fabric, some for specific projects and some just to have around just in case. 


Earlier I was looking through my sewing websites and I was looking on the Sew, Mama, Sew! Blog and came across this super cute project.  And I fell in love!  So I hurried upstairs to the craft room and started my own camera case.


Here is what the finished project looks like.
016


Here is a how-to.  I tried my best to get a picture of each step.

Cast of characters:
002  
12” x 4.5” piece of brown lining
12” x 4.5” piece of batting
12” x 4.5” piece of fabric
Fastener (not pictured) – I used velcro.  You can easily use snaps or buttons.
*Please note that you can adjust it to fit your own camera, so you can add to make it bigger or subtract to make it smaller.

1.  Sew velcro piece to the ‘right’ side of the lining.
004
2.  Stack lining, batting and outside fabric piece in this order:
batting on bottom; outside fabric piece ‘right side’ up; lining piece on top ‘wrong side’ up.
003
3.  Next pin around the edges.
006
4.  Sew around the edges (1/4” seam) leaving about a 2”-2.5” opening for turning.

5.  Turn right side out.  Make sure to use push the corners out using a pointy object.  I used a pencil.
008
6. Tuck the opening in and then press.
7.  Sew both of the shorter sides.  Make sure you sew the opening that you left to turn it right side out.
009
8. Now it’s time to sew the other piece of velcro.  At the opposite end from the other piece of velcro and on the outside piece of fabric measure 1/2” from the edge and sew the velcro piece.
013
9.  Now fold bottom half up 4”. 
014
10.  Pin sides and then sew.
015  
11. Now you are done!
016
Here it is in action:
cameracase cameracase2

It took me about an hour and a half to finish but next time it will definitely take less time since I won’t be reading a how-to.  I really wish that I had some white velcro but I didn’t.  I only had black because I had gotten it for another project.  It was super easy to do and I can’t wait to do more!


Oh and here’s a tip:  I used those fabric quarters that you can get at the fabric store for like $2.   So this was a super cheap project.


blogsignature

Thursday, August 20, 2009

My own Dollar Store Craft.

So my next project will be a ribbon wreath similar to this one I found on Casasugar:


I was looking online to an idea of what they look like, different styles etc. and I came across this wonderful site.


http://dollarstorecrafts.com/

This is so great!  I actually bought my supplies for my ribbon wreath from the dollar store.  I am really excited to try some other crafts and projects from supplies from the Dollar Store.

blogsignature

I found a cute sewing site…

I found a really cute sewing site the other day.  It is Mada’s Place and it has so many neat sewing projects.

   I just love the fabric that she chooses for her projects.  I can’t wait to see other projects she uses and hopefully learn a few things and make some projects of my own.

Monday, August 3, 2009

Chocolate Oreo Balls

If you love oreos then you'll love these oreo balls.


Ingredients:
1 package of Oreo cookies (I used double stuffed)
1 package of cream cheese at room temperature (I used fat free)
2 8 oz packages of dark chocolate chips

First chop up oreos using a food processor.
Next mix in the cream cheese until thoroughly mixed.
Once mixed shape dough into bite sized balls, set on cookie sheet lined with wax paper.
Put cookie sheet in the fridge and let the oreos harden and chill for about an hour.
Meanwhile, melt chocolate in double boiler.
Once the oreo balls have hardened dip them into the chocolate.
Return the balls back to the cookie sheet and place the cookie sheet in the fridge to set about an hour.
Once hardened place in serving dish and add some powdered sugar on top.

So yummy!